Coleman Pop Up ABS Roof Repair
This ABS Roof Repair was performed on our 1998 Coleman Fleetwood Bayside. We tried multiple repairs in various areas that never lasted. The final straw was coming home from the beach and noticing a large section of the camper roof on the awning side (passenger side of the tow vehicle) starting to try and take flight. We had to stop and use good ole duct tape to hold the roof together so we could make it home.

Parts of the Roof:
Exterior ABS plastic roof with an adhered hard plastic awning channel, hard foam core, interior ABS ceiling which houses the interior lights and the inner track for the canvas, 4 mounts for the pop-up lift system poles and the track and snaps for storing the door when the camper is closed.
The Tools:
Screwdriver, Dewalt pad sander, a compressor with hose and blowgun, Roto-Zip, two 2 quart Mason jars, 1 gallon denatured alcohol, ABS pellets (we got a 5lb bag), 1 gallon of MEK (Methyl Ethyl Ketone), respirator, 2 or 3 cheap metal putty knives you are ok with throwing away, 2” wide masking tape, plastic drop cloths, 2 wooden paint stirrers, paper towels, old white T-shirts or a white sheet (to be cut down for rags), work gloves, step stool and order of Grizzly Grip appropriate for the square footage of your roof (having more than you need is better than not having enough – shoot for 10% more than your actual square footage).
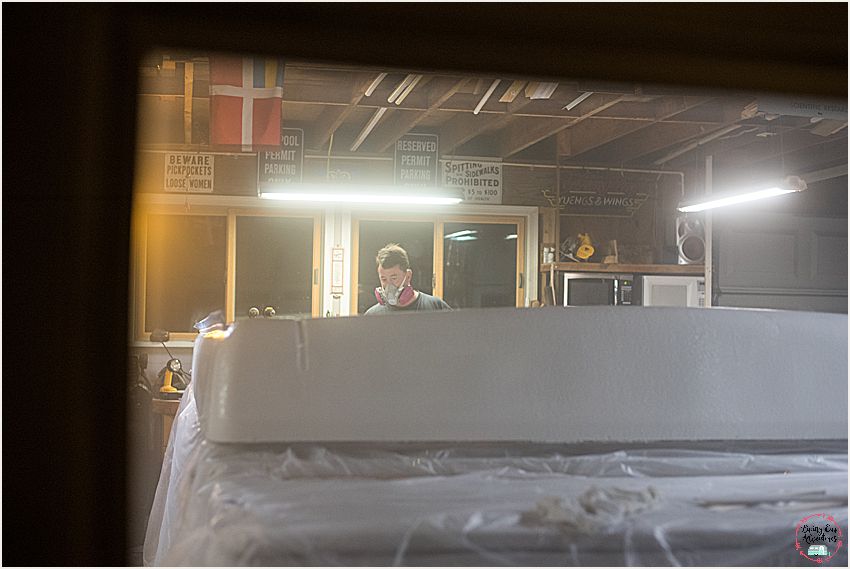
*** I highly recommend you put on your respirator prior to opening up any container that has MEK in it. This product, if used in an enclosed area, is much stronger than you think and will make you very light headed. We were doing this project toward the end of October and it was getting quite chilly at night so 90% of this repair was done in the garage. ***
ABS Roof Repair-
Preparation:
First thing you need to do is raise the top of the pop up about 6 inches and remove the main seal from the roof. Clean the entire edge of the exterior roof and interior ceiling where the seal was touching so you will be able to reinstall the seal with ease when you are done.
Next, we used the masking tape to run along the edge of our plastic drop clothes. Apply the tape so you are only using about half the width of the tape then you can stick the other half along the interior ceiling edge where the main seal rested. This should keep the vast majority of the plastic dust from entering your camper.
Now, using your pad sander sand the entire surface of the ABS roof. No need to go crazy you just need to rough the surface and get rid of any dirt and debris resting on the roof.
When sanding is completed turn on your compressor with your hose and blow gun attached and blow off as much of the dust from sanding as possible. Take some paper towels and the denatured alcohol and thoroughly clean the roof to get rid of any remaining dust.
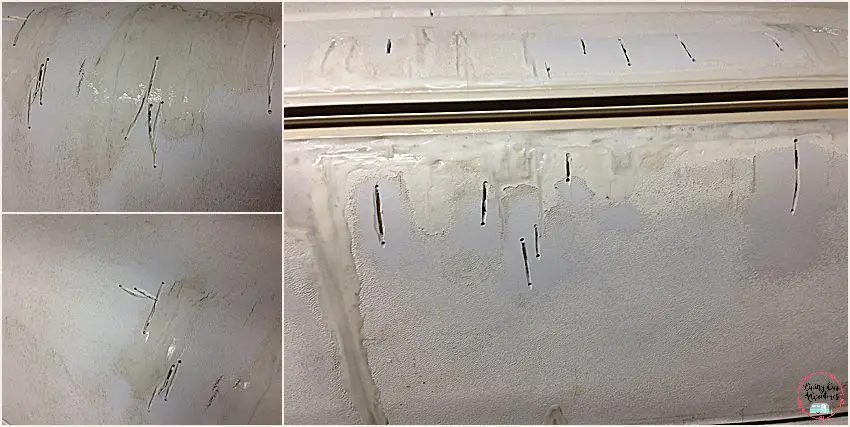
Our camper had many little hairline cracks all over it. They were too small to work the ABS slurry into so we took our Roto-Zip with an appropriately sized bit and one by one opened up each crack. Afterward we used the compressor and blow gun to get rid of any debris left over and again cleaned down the roof with denatured alcohol and paper towels.
Making your ABS plastic slurry:
Due to the number of hairline cracks and the 5 sizable cracks in our roof we needed to make a large amount of slurry. In fact, while we were in the process of creating the first batch of slurry it became abundantly clear that it was not going to be enough to complete the repair so we made a second batch. Each batch started with a one to one ratio – 3 cups of ABS pellets & 3 cups of MEK.
Now is the time to put your respirator on. Take your 2 quart Mason jar and pour in 1 part ABS pellets and 1 part MEK and stir vigorously with a wooden paint stirrer. Put the top on the Mason jar noting that the lid with the rubber ring needs to be reversed when put on the Mason jar so the metal side is toward your slurry then you can tighten down the threaded outer band. The chemical reaction from the pellets and the MEK will melt the rubber ring if put on the traditional way.
Because of the amount of slurry we needed it was necessary for us to stir every 2-3 hours adding more pellets or MEK to get the correct consistency for our use. This process took about 48 hours. Depending on how much slurry you need this might be something you want to start in advance.
Every time we stirred the mixture we would put the respirator on prior to opening the jar and not take it off until the jar was closed and we were leaving the garage.
Apply your ABS plastic slurry:
This part along with applying the Grizzly Grip is what I like to call “Go Time.” You should have your supplies (respirator, gloves, MEK, rag, slurry, metal putty knife and step stool) staged and ready to go. This is one of those steps where once you start you should not stop until you’re finished.
Put your respirator and gloves on. For this task you may want to mentally break the roof up into 4 quadrants so this step is more manageable. Take the lid off your slurry and stir with your paint stirrer and set aside.
Grab your container of MEK and a rag or two. Douse a section of your rag with MEK and in the quadrant you choose to start on first go ahead and rub the rag over the areas you will be applying the slurry to and set aside. The MEK will start to slowly dissolve the areas you applied it to making those surfaces tacky and ready to receive the slurry you are about to apply.
Now grab your slurry, paint stirrer and putty knife. Since we had so many hairline cracks we took slurry out of the Mason jar with the paint stirrer and would put a good sized blob right in the middle of a bunch of these cracks. (Although we had many of these hairline cracks they seemed to be lumped in groups around areas of the roof that were stressed or from long term sun exposure, UV damage.) Using the putty knife we pressed the slurry into the cracks much like doing drywall work. Once satisfied with the amount of slurry in the cracks we then made sure there was a good thick layer of slurry on and around the area. Better to have a heavy hand on this part because when the solvent evaporates from the slurry it contracts and hardens. In our case we had to do 2 and in some places 3 applications of slurry. After each application of slurry had cured we would sand, clean with denatured alcohol and inspect to see if it needed another coat. This was the easiest part.
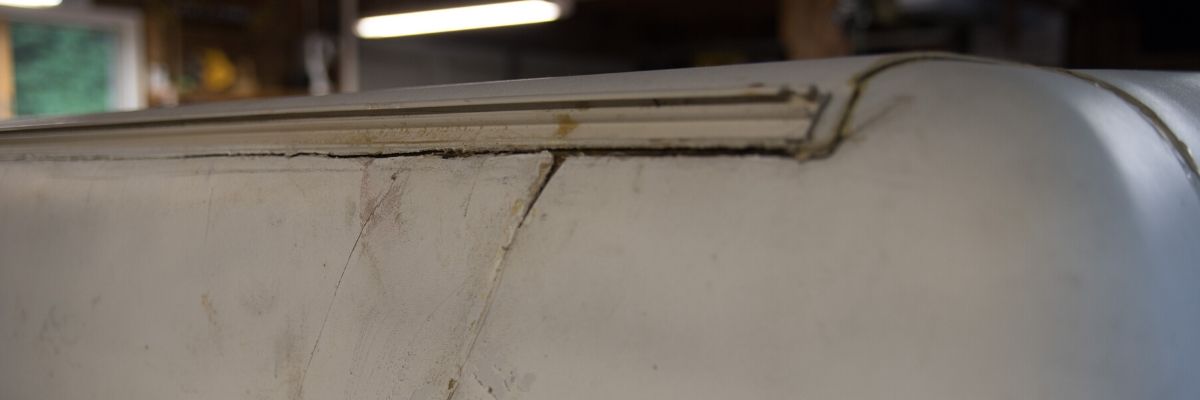
The worst area by far was under the awning channel. Pretty much for the entire length of the awning channel piece where the ABS roof met it on the underside was cracked all the way across. On that same side the ABS had delaminated from the foam core and there were 2 cracks that went from the bottom of the channel piece down to the bottom lip where the main seal attaches to the roof.
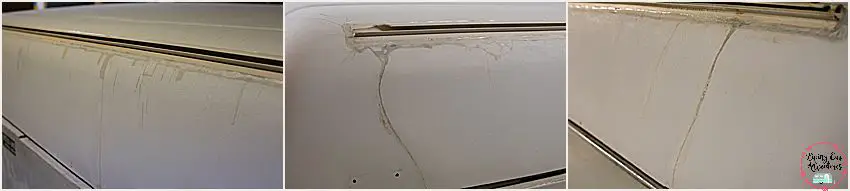
After much consideration we felt in the long run it would be more time efficient and an overall stronger repair to remove the ABS roofing from the side, clean up the cracks on those pieces and the cracked ABS along the bottom of the channel piece and reattach so we could fill all the spaces with slurry and move to the next step. This required 2 intentional cuts thru the ABS piece which turned it into 3 pieces that were roughly 10-11inches wide by about 3 feet long.

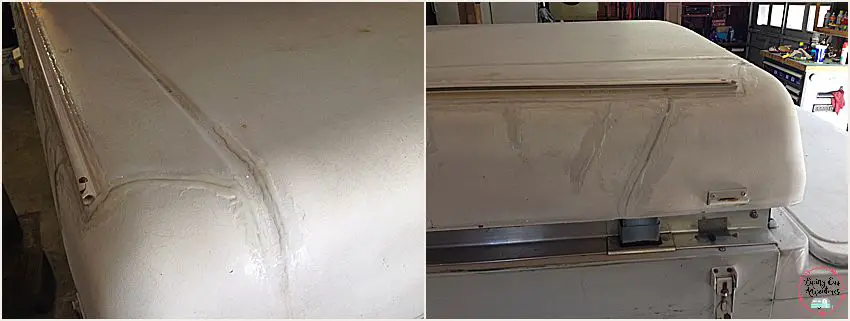
Once these 3 pieces were cleaned up and the edges of the cracked ABS were prepped it was time to reattach them to the foam core in the correct position. We used 3M Foam Fast 74 Spray Adhesive. This spray, along with some well placed pinch clamps, masking tape and the pressure of our hands for a minute or 2 was just what we needed to get these pieces set in their proper places.
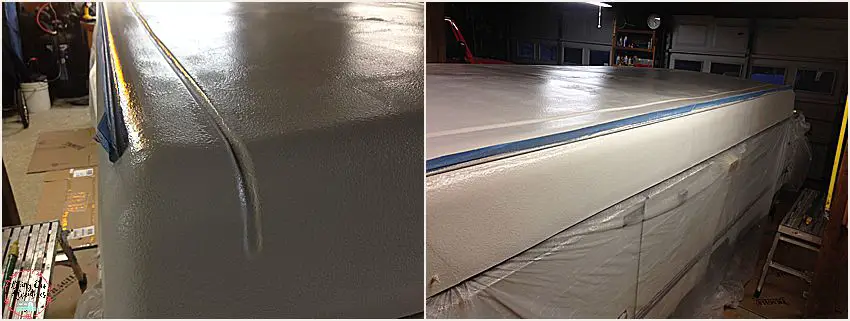
With our ABS side pieces securely in place on the foam core it was time to apply the ABS slurry. For repairs such as this one you go big! We pushed the slurry into every nook, cranny and crevasse. In fact, to reinforce the area of the ABS roof that met up with the bottom of the base plate for the awning channel we basically engulfed the entire area in a layer of slurry that was just as thick as the base plate. Using this much slurry took longer to cure but once it had and the area was sanded down and cleaned up the repair looked great.
Grizzly Grip:
At this point you have finished sanding and thoroughly cleaned the roof with denatured alcohol. Break out your Grizzly Grip and follow the application instructions provided by the manufacturer.
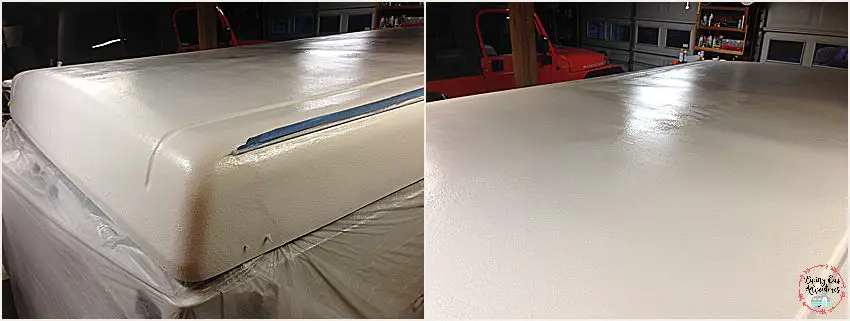
A job well done:
Now that the Grizzly Grip has dried and you have reinstalled the main seal you are ready to show off your hard work……Happy Camping!!! This ABS Roof Repair was a lot of work and took time but it was well worth it in the end. We couldn’t me more happy with the end product and we know that it will last us for years to come.